What are the different types of Neon Signs?
Technically there is only one type of neon, it take around 5 years of practice to get good enough to bend glass to a high enough quality to make a real neon sign. We can manufacture this in-house for you.
If you are interested in the difference between the “different” types, we hope to answer What are the different types of Neon Signs question here for you.
This page is still a work in progress. We will be adding videos in due course, but for the time being we have explained below.
Neon Signs (Only ever made from glass)
How is a neon sign made?
Neon signs are made from straight lengths of glass, these come pre-powdered with a phosphor coating. The glass is heated by hand in a flame until it becomes soft, a bit like spaghetti. Once the glass is soft, it is removed from the flame and bent to shape over a paper pattern by hand, air is also blown into the tube at the same time to keep the tubes shape and diameter, this is either done by a mouth piece or by blowing directly into the end of the tube depending on the style of bending. After each bend is completed out of the flame, the glass is returned to the flame to be annealed, this is done to reduce any stress in the glass. The bend then need to cool before the next band can be done, each and every bend is made this way.
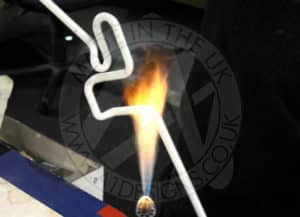
Bending Glass in a Hot Flame to make a Neon Sign
After the Bending process has been completed, parts are assembled into a section. A section can be a few letters when small or part of a large letter, shape or object. Once part are joined, electrodes are then attached to each end of the tube, the tube is then ready to be pumped.
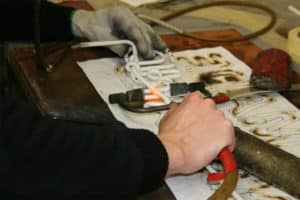
Parts being joined to make neon section
After the Electrodes have been attached the section moves to the final stages, this starts with the section being bombarded. The section is attached to a machine via some small stemming glass, once a seal is created the section is then put under vacuum, voltage is then applied to the tube once a certain pressure is reached, this applied voltage lights up the tube and starts warming the tube and electrodes up. As the tube warms harmless impurities are given off and then removed with the vacuum, (if they were not removed the tube would either not light or would fail quickly). The pressure of the tube is kept low until the electrodes have been activated and the tube has reached the correct processing temperature. Once the tube has been cleaned and the electrodes activated the vacuum is then increased, the tube is allowed to cool before the required gas (Neon or Argon) is added. Once complete the tube is removed from the bombarder and the placed into the aging bay.
The aging bay part of the process allows for the tube to fully come to life and checks for any problems with the tube. Once the tube is ready, all of the drop-backs (parts that are not needed to be seen) are painted out to give the lettering or design definition.
Where can a Neon Sign be used?
Neon signs can be used pretty much anywhere, indoors or outdoors, they are allowed to be used at touching height and don’t burn you when touched. There are times, however, when other options would make more sense, or placing a cover over the neon would be a good choice and there are sometimes electrical regulations that need to be considered. If you wish to discuss how you are looking to use your sign, get in contact and we will be happy to discuss this through with you. Please don’t take the word of an LED company that doesn’t make neon, as they generally don’t understand or know about real neon.
What are the options for mounting a Neon Sign?
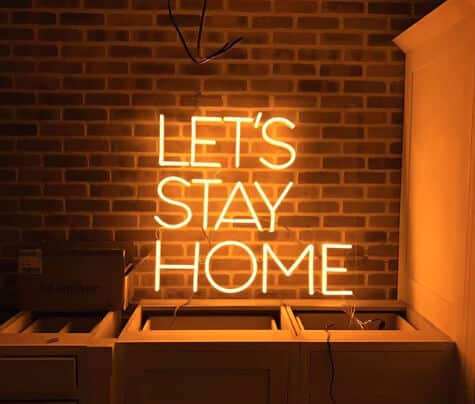
The mounting option for a neon sign are quite varied, from mounting it directly to a wall, to a clear acrylic panel, inside a hung acrylic box, to aged wooden boards or metal panels, basically most rigid surfaces are suitable. If you are unsure please feel to get in contact and we can discuss what you are trying to achieve. Check out our Neon Sign Page for more information.

Sunshine Soul – Neon Sign Mounted to aged wooded boards.
If you would like to see a quick video over view of the neon making process check out our How is a Neon Sign Made video, or to view some completed projects check out our Custom Neon Signs page or our Neon Art page
LED Flex Neon Signs (LED Flex)
How is and LED Flex Neon Sign made?
LED Flex Neon Signs are made using LED Flex, this needs to be mounted to something to hold its shape and is usually attached to either clear or black acrylic. The acrylic is cut using a CNC router to cut a channel in the shape of the required design, the router then cuts the outline of the text or the shape of the design. Once the backing has been machine processed, the flex is then glued in place, with small cuts made into it so that it can be bent to the required shape or design. Pieces of the flex are connected by soldering small cables between them, these connections can be a bit fragile due to the size of the small cables used.
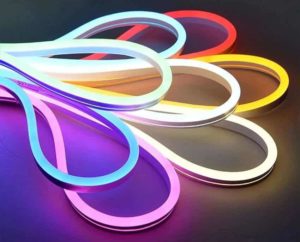
LED Neon Flex
Where can it be used?
LED Flex Neon signs are mainly intended for indoor use. The reason for this is the way they are manufactured, cuts are made into the sealed LED Flex, these are necessary to bend the flex to follow the shapes required they are also cut in order to make the required soldered connections between pieces. These cuts need to be sealed back up, this is done manually with silicone and although it will provide weather resistance we wouldn’t recommend their use for prolonged periods outside or in exposed locations. The acrylic backing can be on the fragile side.
LED Flex Neon Sign Mounting Options?
Due to the nature of the way the LED Flex Neon signs are made they need to be mounted directly to acrylic. This can then be either hung, or fixed in place using sign supports or directly screwed to the wall. Check out our LED Flex Neon Sign page for more information.
Open LED Flex Neon Sign mounted to Black Acrylic.
If you would like to see some completed projects manufactured from LED Flex visit our LED Flex Neon Signs page, or you can view our video showing the product close up here.
LED Neon (Acrylic Block Lettering)
How is LED Neon made?
This version of “Neon” is made from a solid block of 30mm thick acrylic, the rear of the lettering is routed out to make space for LED’s to be put in to the back, the the outline is cut out for the lettering or design. Once the router has completed cutting out the lettering or design, it is cleaned up. The backs are then cut from a choice of materials depending on its final use. The final design choice will either require a flat face or rounded face. if a round face is required the acrylic face is then routed and cleaned up, either type then moves onto the next phase.
The next step is the mounting and soldering of LEDs inside the back of the letters or design, the backs are secured in place and then the sides are wrapped in a block out vinyl. Suitable fixing are then secured in place for the lettering or design to fitted into place.
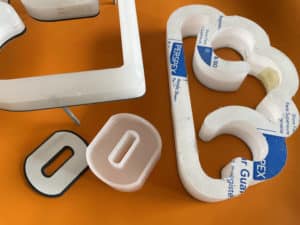
LED “Neon” – Acrylic Parts
Where can it be used
This type can be manufactured for either internal or external use, but we need to know beforehand as the process is slightly different depending on the use case. This type of design is robust and quite resistant to damage.
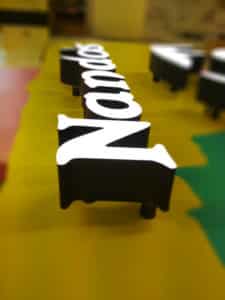
Nando LED Neon – Block Acrylic Lettering
Mounting Options
There are a variety of option with this design including directly to a wall or mounted to a variety of rigid substrates, please get in contact to discuss your requirements. Cabling will need to be a consideration as each part will have a cable running to it. Check out our LED Neon Section for more information.
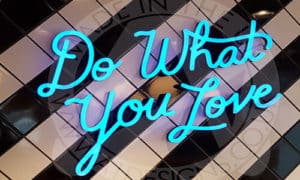
Do What You Love LED Neon Sign mounted to tiles.
A variety of completed projects can be viewed on our LED Neon Signs Page.
How is a Neon Sign Made?
Real Glass Neon signs have become a very popular medium for both businesses and for people to have in their home, have you ever wondered, How is a Neon Sign is Made?
It takes years of practice to become a skilled neon glass bender. Learning the art begins with bombarding tubes, butt joining glass sections, attaching electrodes and practicing simple bends whilst getting used to the way the glass moves and reacts.
Check out our video below for a quick overview of the process.
To see some example of finished neon signs or get some more information visit our Neon signs section. If you are looking at some of the faux alternatives available, check our blog on the “different” types of Neon.
LED Flex Neon Signs Close Up
Welcome to our video showing a close up on the Quality of the LED Flex Neon Signs that we have produced.
We have spent a great deal of time making sure the company producing these for us in China understands the quality level we expect. As UK manufacturers we have a high standard that we produce and expect for all our signage. Enjoy our LED Flex Neon Signs Close Up Video.
If you are looking for alternative options you can check out our What are the Different Types of Neon Signs? Or you can view more information on our LED Flex Neon Signs Page.
How to Install Your LED Flex Neon Sign
This is a brief guide on how to install your LED Flex Neon Sign, not to be confused with installing a real neon sign as this can be a very different process. If you do not feel confident doing this we suggest asking someone who is more confident they can carry out the task safely.
You will need a few things before you start.
- A basic level of DIY ability.
- Drill.
- Stud/Electric Cable Finder/Digital Detector.
- Level.
- Pencil.
- Screwdriver.
- Screws.
- Suitable wall fixing depending on the wall type. (Plastic Wall Plug or cavity wall fixing).
- Sign Hardware (Supplied by A1deSIGNS – Sign Supports Or Hanging Chain).
- The LED Flex Neon Sign.
Step 1 – Positioning your LED Flex Neon Sign.
Possibly the most important step of all. We are pretty sure you had an idea of where you wanted the sign to go before you ordered, but now is a good time to make sure you were right. Get someone to hold the sign in place (be careful not to drop it acrylic can break when dropped), step back and check that it will look right, you can even get the sign lit up whilst it’s being held in place. Check that it doesn’t look better somewhere else alternatively you can always order another one for that awesome spot you just found. Usually, the same height you would put a picture is best and equidistant between objects on either side.
Once you have found your position you can use a level on the edge of the rectangular panels, or you can use the level running along the bottom line of the text to get things looking as they should. Sometimes things don’t always look right level, so deliberately putting things at a slant can give your LED Flex Neon sign that quirky feel.
Hopefully, now you have things where you want them, mark the fixing holes in the acrylic panel with a pencil. This should give you several circles marked on the wall when you take down your sign.
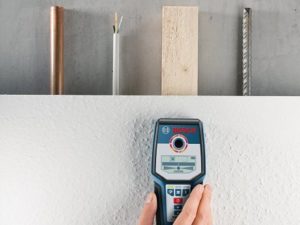
Checking for cables and pipes before installing your LED Flex Neon Sign
Step 2 – Drilling
With your holes marked on the wall from step 1, check the location of the marks with a digital detector to make sure there are no cables or pipes where you will be drilling. You can now drill a hole in the middle of each of the circles. Ensure you are using the correct fixing for your wall type and the correct size drill bit for the fixing.
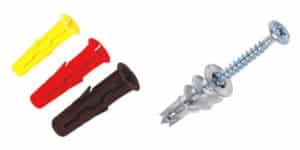
Wall plug or Plasterboard fixing for your LED Flex Sign in place
Step 3 – Fixing
Once you holes have been drilled insert the wall fixings, then unscrew the head of the sign support and slide the screw down the cylinder until the thread has come through the other end. Insert your screwdriver down the cylinder until it sits in the head of the screw, carefully fasten the screw into the wall fixing being careful not to overtighten. Repeat this for each of your fixing points.
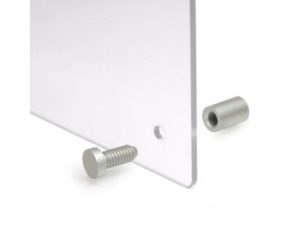
Sign Support to secure LED Flex Neon Sign in Place
Step 4 – Secure
With all your sign supports in place on the wall, take the previously removed heads and insert them into the hole in the acrylic panel, then offer the panel up to the fixing point for that hole and fasten in place, leave the fixing slightly loose until all fixings are in place, as this allows the panel to move around to ensure you can get all fixings in place. Once all fixings are in place tighten up the fixings so they hold the panel securely, don’t overtighten them or bend the acrylic as it can cause it to break.
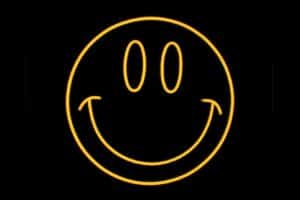
Smiley LED Flex Neon Sign
Step 5 – Let There Be Light
Once the sign is secured in position it is now time to deal with the cabling. If your sign comes in multiple pieces, make the connections between each part of the sign. Each sign comes with a 1.5m clear cable from the bottom that has a female power connector, you can either just let this hang or secure the cable in place with cable clips, other options are available but may require a skilled professional to install the sign. You can then take the transformer and plug the male end into the female clear connector and plug the transformer into a nearby socket. If you have a dimmer this will go in-between the male and female connections.
We hope you have found this guide useful and hope you enjoy your LED Flex Neon Sign.
We do not accept any liability for damage or injury arising from following this guide, all due care and attention should be applied when installing your sign, if you do not feel confident please ask someone who is.
How to Style Custom Neon Lights
Custom neon lights are a huge style statement, whether they are for your bar, restaurant or your home…
Picture Perfect Neon Lights
Over the last few years, custom neon lights has become more and more popular and demand has gone through the roof. It has taken off so much thats is now the latest trend across Instagram and is now featuring across home interior shows and commercial branding and interior design talks.
Neon really is the go-to accessory for your home and workplace!
Top of Trends; Neon!
Senior buyer of Debenhams, Claire Woodward has taken the neon trends in her stride by ensuring that they provide enough neon lighting and signage for everyone, in all colours and designs.
Many famous people are jumping head over heels for the trend as the Beckhams’ have recently invested in a custom neon signage piece, Lady Gaga was right behind them by purchasing her own statement neon light, and the British supermodel Kate Moss reportedly spent £100,000 on a custom neon sign of her own signature. Singer and Author Tom Fletcher, also has installed neon lighting in his home as a feature piece and talking point.
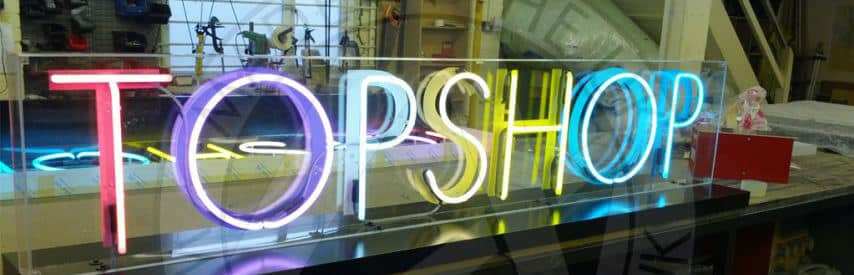
But it’s not just celebrities that are taking neon home, commercial and retail giants like Superdry and Topshop have also had neon lights and signage commissioned from A1deSigns to install in their larger stores in and around London.
Bars are opting for the classic ‘Cocktails’ sign that is synonymous by the Tom Cruise film of the same name, restaurants are opting for neon lights and signs to direct people around the restaurant and showcase what they have on offer, like this one who installed a ‘Budweiser’ sign in their establishment, and coffee signs to show that bars also do hot drinks as part of their drinks menu.
There are a range of uses for these signs in your workplace such as;
- Toilet signs
- Direction signs
- Bar signs
- Logo signs
- Diner signs
- Mood lighting
- Wall features
- Branding signs
- Product signs
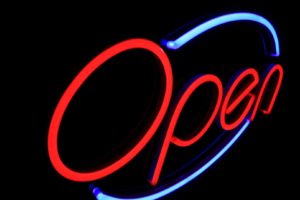
- Open & Closed signs
- Quote & positive message signs
- Kitchen signs
- Slogan signs
- External signs and arrows pointing to the entrance
- Decorations such as Flamingo or palm tree design neon lighting
Choosing your Neon Lights
When it comes to your home, you have just as many possibilities, whether that be features, decorations, logos and more. You can create your very own unique and bespoke neon sign for any location, work or home.
The effects of neon lights and signage speak for themselves in terms of impact on the overall design of a room or commercial setting. We love creating new and bespoke designs so why not invest in one today and take your interior design to the next level.
Contact our team today for more information on how we can help you create your dream neon sign.
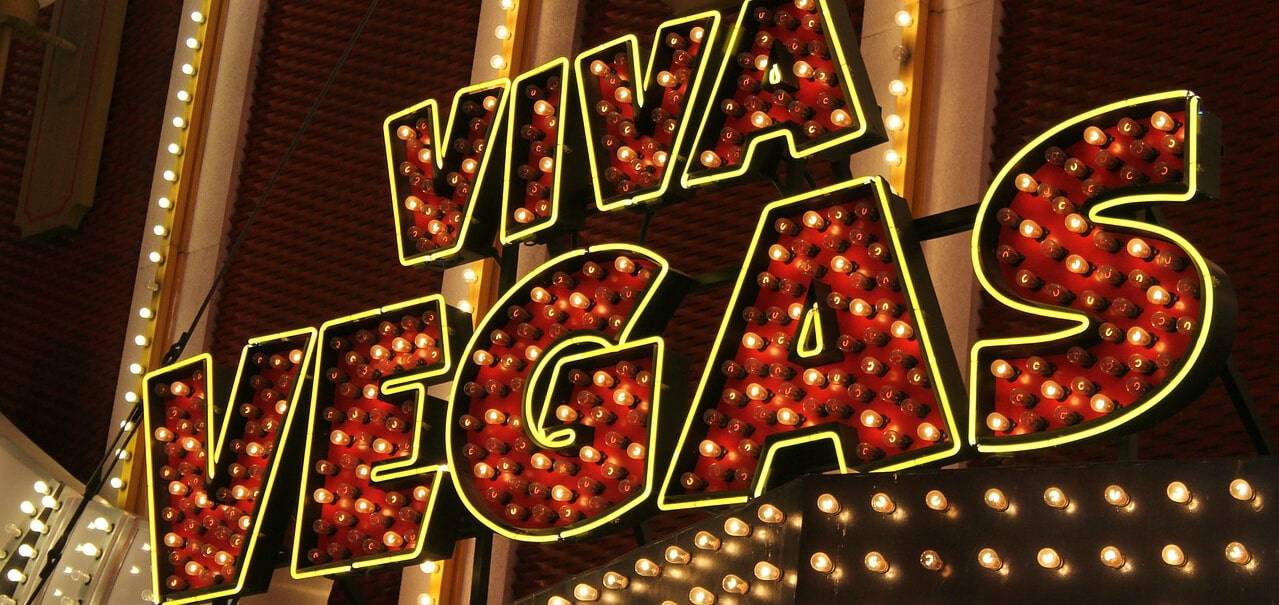
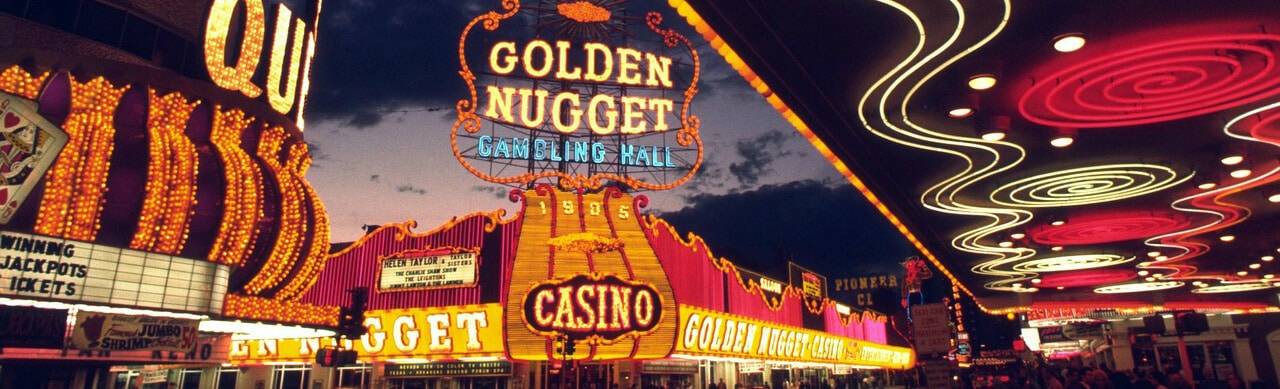
Neon lighting: America is Bringing It Back
When you picture neon lighting, some may think of the LED neon lighting or Neon Signage that is often used in pubs, bars and restaurants. However, many others will harp back to a more nostalgic time of the 1930’s, 40’s, 50’s and 60’s, picturing the iconic neon lighting of Las Vegas, America. Or the Sunset Strip and the nights that never end in the casinos that never close.
Those iconic signs were thought to be lost to a time gone by, but a team of people based in Vegas have been restoring as many of the neon signs as possible but not in ways you might think. Taking today’s technology and putting it to fantastic use. The team have managed to recreate the infamous signs through augmented reality and let the lights shine bright once again.
This is a major sign of the times when neon was at its peak in popularity. It has made a comeback and reached those heights once more, thanks to the new technology allowing them to be projection mapped as part of an installation at a Neon Museum in America.
Those neon signs that once drew visitors to Vegas, are now able to draw more visitors to the Museum and bring that nostalgia of a neon lit vegas back to life. The signs on display include the red ‘Lady Luck’ sign, Binions Horseshoe and the ‘Star’ part of the iconic ‘Stardust’ sign (they don’t have the ‘dust’ part of the sign available to recreate using this type of augmented reality).
The whole project was able to be put together thanks to the use of drones that filmed each and every element of the signs, each bulb, corner and crevasse to be able to recreate the signs in extraordinary detail. This also helped with the elements that were missing, for example, those that were missing bulbs then were able to be ‘put back in place’ thanks to the digital imagery catalogue.
Since being introduced to the world in 1893 at the World Fair in Chicago, Neon signs have seen many rises in popularity over the years, but no location has been more synonymous than Vegas with the bright colours of neon.
Neon signage is on an upwards turn in terms of popularity and this is simply highlighted by the demand for these infamous relics of American history to be ‘lit’ once again. This is a trend that is continuing over here in the UK with massive increase in demand for neon signs for bars, clubs and restaurants. Once again being used to attract the crowds, neon is working its magic and becoming the go to for external signs. Some are taking the trend to the next level by installing these brilliant signs inside to create a retro feel.